If you’re new to indoor tanning or have never tried a stand up tanning bed, this guide will walk you through how it works. We’ll cover whether it delivers better results, how to prepare, and what to expect. The goal is to help you get a more even, longer-lasting tan.
What is a Stand Up Tanning Bed?
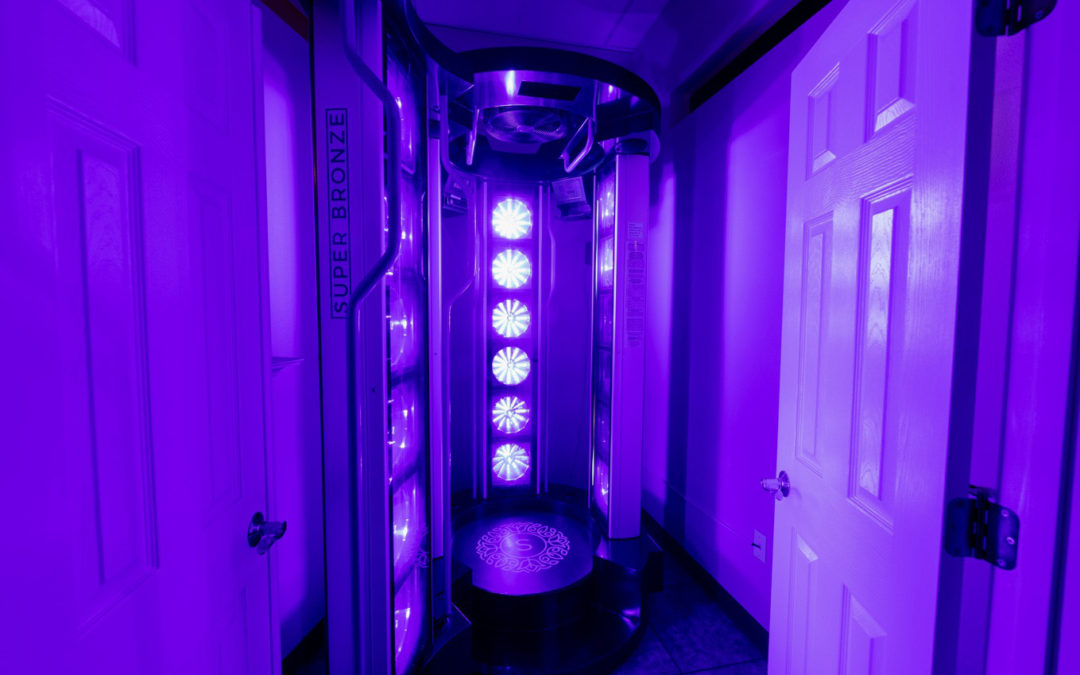
A stand up tanning bed is a type of indoor tanning where you remain standing instead of lying down. It uses UV light bulbs to tan the skin, just like a traditional bed.
Many people prefer this option because they believe it gives a more even tan. But is that actually true? Let’s take a closer look at whether a stand up tanning bed is better than a lay down bed.
Stand Up Tanning Bed vs Lay Down
Stand up and lay down tanning beds serve the same purpose, but there are a few key differences.
Some people prefer the minimal contact of stand up beds, even when salons follow strict hygiene procedures. Others see traditional tanning beds as a chance to relax and unwind for a few minutes.
When it comes to coverage, stand up beds can offer a more even tan because there are fewer pressure points. Still, your stance matters. You need to hold the right position to get consistent results. That’s where skilled staff come in.
Always choose a tanning salon with trained experts, like SunsUp Tan & Wellness Spa. Our team can recommend the best pose for your body and help you figure out the right session time based on your skin type.
How to Use a Stand Up Tanning Bed?
Just step into the tanning bed. The timer will already be set by the staff based on your consultation.
Next, make sure you stand in a position that gives you even exposure for the best results. If you’re unsure, don’t hesitate to ask for tips on how to position yourself correctly.
Remember, what you do before and after tanning is just as important as your time in the tanning bed. So let’s go over the prep steps and post-care tips that help you get the most out of your session.
Stand Up Tanning Bed Tips for the Best Results
Here are the most useful prep and aftercare tips for a stand up tanning bed.
What to do before:
- Exfoliate your skin the day before to remove dead skin cells and help your tan last longer. We recommend our Bamboo Exfoliant for the job. It not only clears away dead skin but also calms irritation, fights breakouts, and leaves your skin feeling fresh and glow-ready.
- Skip lotion, perfume, and oils since they can block UV rays or cause irritation.
- Apply indoor tanning lotion since it can boost results and keep your skin moisturized. We recommend MR International tanning lotion, a high-end, salon-exclusive formula you won’t find in stores or online. It’s designed to deliver deeper color while nourishing your skin at the same time.
- Wear protective goggles that are FDA-approved to keep your eyes safe.
- Remove jewelry and tight clothing to avoid tan lines and get the most even coverage.
What to do after:
- Moisturize with a fragrance-free lotion to keep your skin hydrated and extend your tan. We recommend TriLuxe Lotion by REDLIGHT+. It’s packed with vitamins A, C, and E, and enriched with olive, shea butter, and coconut oil to nourish and plump your skin.
- Wait a few hours before showering if you used a bronzing lotion to let the color fully develop.
- Give your skin a break between sessions; wait 24 to 48 hours before your next visit to avoid overexposure.
Stand Up Tanning Bed Time Chart
How long should you tan in a stand up bed? That depends on your skin type and how often you go. We always recommend starting slow. While personalized advice is ideal, this stand up tanning bed time chart gives you a solid starting point.
| Skin Type | Week 1 (First Visit) | Week 2 | Week 3 | Week 4 |
| Type I (Very fair, burns easily) | – | – | – | – |
| Type II (Fair, sometimes burns) | 3-4 minutes | 5-6 minutes | 6-7 minutes | 7-8 minutes |
| Type III (Medium, tans gradually) | 5-6 minutes | 7-8 minutes | 8-9 minutes | 9-10 minutes |
| Type IV (Olive, tans easily) | 6-7 minutes | 8-9 minutes | 10 minutes | 10-12 minutes |
| Type V-VI (Dark, rarely burns) | 7-8 minutes | 10 minutes | 12 minutes | 12-15 minutes |
A Pro Tip for Type I Skin
If your skin is very fair and burns easily, we don’t recommend UV tanning at all. The risk of burning is high and the chances of developing an even tan are low.
Instead, go for a spray tan. It’s completely UV-free, gives a beautiful glow, and lasts up to 7 days. For fair skin, this is often the safest and best-looking option.
If you’re looking for an all-natural spray tan that doesn’t stink or stain, visit SunsUp Tan & Wellness Spa.
Final Thoughts
Stand up tanning beds can be a solid option if you’re after even results and less contact with surfaces. Just like any tanning method, the key is knowing how to prep, how to position yourself, and how to take care of your skin afterward.
Whether you’re trying it for the first time or switching things up from a lay down bed, follow the tips in this guide and always talk to a tanning expert to get the most out of your session. And if you’re looking for a salon that knows how to do it right, the team at SunsUp Tan & Wellness Spa has your back.
FAQ
Are stand up tanning beds better?
It depends on what you’re looking for. Stand up beds are great for even coverage since you’re not lying on any pressure points. Some people also prefer it because there’s less contact with the bed surface. If you want a faster session with more freedom to move, stand up might be the better choice for you. But if you’re after a more relaxing experience, a lay down bed could be the way to go.
Are stand up tanning beds stronger than lay down?
Usually, yes. Stand up beds often use higher-intensity bulbs, which means shorter sessions and potentially faster results. That said, stronger doesn’t always mean better for everyone. If you’re new to tanning or have sensitive skin, it’s important to start slow, no matter which type of bed you use.
How to tan in a stand up bed?
It’s simple. Just step inside after the staff sets your time. Stand in the center and hold the handlebars, or follow any pose advice given by the salon. The key is to keep your body evenly positioned so every area gets equal UV exposure. And most importantly, don’t forget your goggles.


Recent Comments